Backing up photos to a portable hard drive without a computer

In preparation for my upcoming trip to Iceland, I’ve had to tackle a problem faced by many travelling photographers: How do I backup my pictures without having to lug my laptop around with me??? Being surrounded by a plethora of gadgets these days, it seems to me this should be a no brainer issue. Turns out it’s not. You can’t simply plug your camera into a portable hard drive and transfer the files over. Of course, you could use a laptop or other portable computer to do this. But it seems like overkill to carry around a large, relatively expensive device for the sole purpose of backing up images.

So I thought to myself, surely there must be a small, portable device out there that will act as an intermediate between my camera and portable hard drive, allowing me to easily copy pictures from one to the other when out and about. I discovered there are a handful of devices on the market that house a small hard drive (small physically, not storage wise), and have a slot to plug your memory card into, allowing you to copy your images from the memory card to the hard drive.  However, these devices are quite expensive, not particularly fast (surprising, given the availability of USB 3 now), have limited capacity, and not all allow you to copy to a second, external hard drive for the purposes of backing things up in duplicate (which I HIGHLY recommend). In the words of Kevin O’Leary, there must be a better way!!!

The next thing to pop into my head was, “Hey, I’ve got this pretty versatile little device sitting in my pocket at almost all times… my phone! Could I possibly harness its power to copy pictures from one digital medium to another?” After Googling around a bit, I determined that yes, it is in fact possible to do this. It turns out a lot of people have thought of this idea before me… however most of the info I came across on the internet is spread about in bits and pieces in tech/photo discussion forums and the like. So, I figured I’d do this little write-up for those in the same shoes as me, to hopefully make their lives a little easier by summarizing this info in one spot.

Not sure if this will work on all phones/tablets (my guess is it will not work on Apple devices), but apparently it works on at least a subset of Android devices. I can guarantee that it does work on the Samsung Galaxy Note 3, as I have now tested it on there successfully. Here’s what you need:

  1. Galaxy Note 3 (will probably also work with some other Android devices with a USB port)
  2. A USB-based memory card reader
  3. An external, portable hard drive
  4. A USB hub
  5. An OTG adapter cable that fits the USB port on your Android device (for the Note 3, this means either a male micro USB or male USB 3 port) – these can be purchased on eBay, Amazon, etc. for a few dollars

The idea is to plug the USB port into your Android device using the OTG adapter cable (i.e. the USB hub cable should be plugged into the female part of the OTG adapter cable, and the male part of the OTG adapter cable should be plugged into the Android device). Then all you have to do is plug the card reader (with a memory card inserted in it, of course) into one of the ports on the USB hub, and plug the portable hard drive into another one of the USB hub ports. Wait a few seconds for both external devices to be read by your Android device, and voila, you’re ready to start copying image files. I personally use an app called ES File Explorer to copy the files, but I’m sure there are many similar apps that would also work.

Using this technique, I was able to copy files directly from my camera’s memory card to my 1 TB portable hard drive at a speed of about 17 MB/s. That means it would take about 1 hour to back up an entire 64 GB memory card… not crazy fast, but not too bad either. My plan would be to do this a couple of times at the end of each day while I’m travelling (as I mentioned, I always back things up in duplicate, and so would have to carry out the process using two separate hard drives).

A few things to note:

  1. At least with the Note 3, unless you’ve rooted it, the hard drive needs to be formatted in either Fat32 or exFat format – NTFS will not work. I’m no expert, but my understanding is that Fat32 supports a maximum file size of 4 GB (potential issue for people making long videos) and a maximum overall drive capacity of 2 TB. So you’re better off using exFat, which seems to work fine based on my experience so far.
  2. It’s better to use an externally powered HUB and/or hard drive, to avoid potential power draw issues and to reduce draining your phone’s/tablet’s battery.
  3. With some cameras, you may be able to circumvent the need for a card reader by plugging the camera itself (with the memory card in it) into the USB hub.

I’m hoping to be able to increase the transfer speed by using a USB 3 HUB and USB 3 OTG adapter (I’m currently using USB 2 versions). It’s possible that the phone is the limiting factor, but I figure it’s worth a try. I’ll update this post once I’ve given it a go.

The importance of backing up your photos (and other data), and my preferred strategy

I just heard a horror story from an excellent wildlife photographer whose work I admire a great deal, and thought it worthwhile sharing the story. Long story short, this photographer had several hard drives filled with photos sitting in his car. The car was broken into, and the hard drives stolen, along with EVERY SINGLE photo he’d ever taken. In his own view, the fruit of years’ worth of extremely hard work and passion simply evaporated, in one fell swoop. As you can imagine, this poor guy is totally devastated, to the point where he’s considering abandoning photography altogether (which I strongly feel he should NOT do!). I know if this happened to me, you’d have to peel me off the wall of the psych ward.

Anyways, I’m sharing this story as a stark reminder about the importance of your data backup strategy, whether it be photo data, work/personal documents, or whatever computer data you consider valuable and irreplaceable. There are so many things that can go wrong with computer storage systems. They can be stolen, they can be destroyed in fires/floods/etc., and they can (and eventually WILL) fail due to breakdown of internal components/materials. So a good data backup strategy is absolutely ESSENTIAL.

The system that I use for my own photos is the following (but the same system can be used for any type of data, not just image files): I have every photo I’ve ever taken (along with the corresponding edited versions) sitting on a fast internal hard drive. This is the hard drive I work off of for viewing and editing my photos. I then have an exact mirror of everything that’s on this internal drive on TWO separate external hard drives. I keep one of these external drives on my computer desk at home, but I keep the second one off-site, in my office at work. This off-site storage is a critical aspect of a good backup system, and one that many people overlook.

With this approach, I’m protecting myself against all the ways in which something can go wrong. If one or even two of these drives fail, I’ve still got one more. If there’s a break-in, fire or flood at my apartment or in my office at work, I’ve still got at least one other, unaffected hard drive. If I accidentally delete an image or otherwise make some unwanted human error, I’ve still got two other drives to go back to. Basically, all of Vancouver would have to go up in smoke for me to lose my data. If that was the case, I’d probably have bigger problems than losing my data.

There are, however, a couple of things to watch out for with this approach. One is that it relies heavily on performing backups on a regular and frequent basis. I personally do this manually (what can I say, I’m a control freak); but there are various pieces of software out there that will perform automatic backups at predetermined intervals. Do keep in mind, though, that you’ll still have to perform at least one manual backup from time to time – namely for the drive that you keep off-site, which you’ll either have to bring home temporarily or bring new data to. This brings me to the second issue, which is that, if you deal with the off-site backup by bringing the drive home, there will be some period of time during which all the drives are in the same place. This is a very risky, vulnerable window of time. So either minimize this time window (but we all know how that can work out, as in the case with the photographer I started this post off with), or get new data to your off-site drive by bringing one of your home drives to your off-site storage location.

There are other, fancier backup systems out there, such as RAID arrays and so on. But after some research into these, I’ve found them to be overly complex and expensive for my needs. And some of these systems even have severe limitations, such as if the actual RAID system dies (not the drives that are inside it, but the RAID system itself), the data on the drives can end up forever locked away on the drives, encrypted in some proprietary format. So, for the vast majority of people, I highly recommend my own system that I described in detail above.

For people with smaller amounts of data to backup (say, in the dozens of GB range or less), another great option is to use an online service such as Dropbox (many of which are free). These services allow you to sync the data that’s stored locally on your hard drive with “the cloud”. That way, if your hard drive crashes, gets stolen, or destroyed, you just have to get a new hard drive and re-download all your data from the cloud. Another great advantage of this approach is that it allows you to access the same data on multiple computers in multiple locations (for example, you can access your documents on both your home and work computers, without having to worry about which version is the most recent). This is in fact the strategy I use for my non-photo data (i.e. documents, music, etc.). However, the drawbacks with this approach are: (1) It doesn’t work well if you have large amounts of data, due to internet bandwidth and download/upload limitations (imagine trying to download/upload a terabyte of data, for example – this would take months for most people!), (2) there are sometimes privacy/security issues, in that the cloud data is stored on non-local servers, which may not be totally secure or impervious to governmental prying eyes.

Whatever your data backup strategy, make sure you do have one and adhere to it regularly, because if you don’t, it’s just a matter of time before you lose your precious data! If you don’t already have a backup strategy or if yours could be improved, I hope this article helps you.

ADDITIONAL NOTE 1: When backing up your photos, if you work in Lightroom or some equivalent, make sure to back up your photo catalog along with your images. While the catalog data is not quite as critical as your actual image data, imagine how long it would take to reconstruct all the edits you’ve done over the years!

ADDITIONAL NOTE 2: If you adopt the approach that I use, when mirroring your primary hard drive with your backup drives, be very careful not to mess anything up, as whatever mistakes are made will be transferred to the backup drive. For example, if you’ve accidentally deleted a file on your primary drive, this file will then be deleted on your backup drives when you perform the mirroring procedure. For this reason, I take EXTREME care when mirroring. You can get around this issue by performing additive backups instead of mirroring (i.e. making a completely new backup from scratch every time, keeping past backups totally intact), but this method will use FAR more hard drive space, and may not really be feasible if you have a lot of data.

The fundamentals of photography

A friend of mine recently asked about some of the fundamental concepts of photography  – you know, the ones that every person who’s decided they’d like to get a little more serious about photography should be aware of. My response ended up being fairly long – probably more than my friend had bargained for. But once someone gets me started on a topic that I’m so passionate about, it’s hard for me to keep a lid on things. Anyways, I figured I’d turn my response into a blog post discussing some of the things every new aspiring photographer should know.

Basic camera anatomy:

I’ll keep this simple and to the point, without getting into the nitty gritty details of how a modern camera works… but basically, cameras consist of a body that houses the image sensor (which is equivalent to film in film cameras), as well as a lens that focuses light into the camera and onto the sensor. Also inside the camera body, lying between the lens and the sensor, is what’s called the shutter. The shutter is essentially a curtain that acts as a gate, opening and closing to either allow light coming in through the lens to hit the sensor, or to block it. Most of the time, the shutter is closed, preventing light from hitting the sensor. When you take a picture, the shutter opens up, allowing the light to pass through the gate and hit the sensor (typically, the period of time the shutter remains open is a fraction of a second, but times of minutes or even hours are often used in certain situations). I’ll add that in many modern cameras, there is actually no physical shutter. In these cameras, instead of having a curtain that controls the light hitting the sensor, the sensor itself turns on and off.

Exposure:

Although this may not be the most technically accurate definition of the term, I find it most helpful in practical terms to think of “exposure” as image brightness. The unit that is used to express changes in exposure is a “stop” (note, this term is used to describe changes in exposure, rather than an absolute exposure value). An increase of one stop means a doubling of exposure, an increase of two stop means quadrupling the exposure, and so on. A decrease of one stop means cutting your exposure in half, a decrease of two stops means one quarter of the original exposure, etc.

Exposure is a function of the three main settings on pretty much any camera, namely shutter speed, aperture and ISO. Shutter speed is the length of time that the camera shutter remains open – in other words, it’s the amount of time that light is allowed to hit the image sensor. The longer the light is allowed to hit the sensor, the brighter the resulting image will be (the higher the exposure). Aperture is simply the size of the opening in the lens that lets light through it, which is controlled by a constricting, iris-like mechanism, usually on the camera-facing end of the lens (this is distinct from the shutter). The higher the aperture value (the measurement for this is “f-number”), the smaller the lens opening, and therefore the less light that is let into the camera. So, for example, setting the aperture to f11 would result in a smaller opening and less light entering the camera than setting it to f8. Finally, the ISO is a term used to describe the sensitivity of the image sensor to light, where the higher the ISO value, the more sensitive the sensor (in a practical sense, this means the more easily the senor can detect light). So, all other things being equal, the higher the ISO, the higher the exposure.

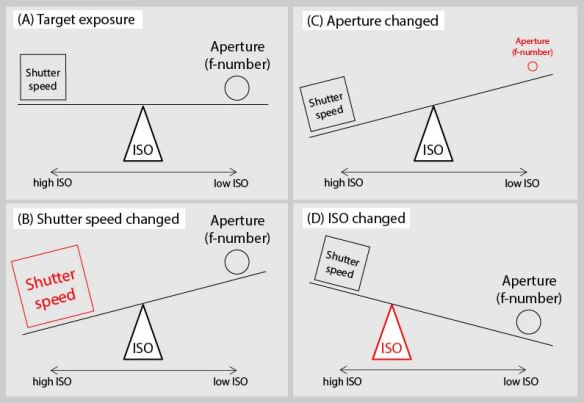
You can think about the relationship between these three aspects as a seesaw, where, to achieve a given exposure, a change in one setting will necessitate a compensatory change in at least one other:

Exposure relationship seesaw

In the image above, A shows a “target exposure”, which is achieved when a perfect balance between shutter speed, aperture and ISO is attained. For the sake of this example, let’s assume target exposure is achieved when shutter speed is 1/50s, aperture is f11, and ISO is 200.

In B, when shutter speed is changed, things are thrown out of balance. In this example, shutter speed has been increased (i.e. faster shutter – e.g. from 1/50s to 1/100s). This causes the seesaw to dip on the shutter speed side. In order to compensate for this and return balance to the system (i.e. to weigh down the right side of the seesaw to get back to the target exposure), either a larger aperture (i.e. a wider lens opening – e.g. from f11 to f8) is needed, or ISO needs to be raised (shifting the pivot point of the seesaw to the left – e.g. from ISO 200 to 400).

In C, when aperture is changed, things are again thrown out of whack. In this example, a smaller aperture is used (i.e. smaller lens opening – e.g. from f11 to f16), causing the seesaw to raise on the aperture side. In order to get back to the target exposure, either shutter speed must be reduced (i.e. slower shutter – e.g. from 1/50s to 1/25s) or ISO must be raised (shifting the pivot to the left – e.g. from ISO 200 to 400).

In the final example (D), a higher ISO is used, and must be compensated for either by increasing shutter speed (i.e. faster shutter speed – e.g. from 1/50s to 1/100s) or the aperture must be reduced (i.e. smaller lens opening – e.g. from f11 instead of f16).

Taking this concept one step further, note that, in each of these cases, you could also use a combination of adjustments to restore balance. For example, going back to B, instead of using only a larger aperture value or only a higher ISO, you could make a partial adjustment to both aperture and ISO.

If you think about this seesaw model in terms of what’s actually happening with the camera, it helps to understand why making such changes would be necessary. In B, for example, if shutter speed has been increased, the light is allowed to hit the sensor for a shorter period of time. In order to compensate for this, you could use a larger aperture, which would allow more light into the camera. Alternatively, you could raise the ISO, which would make the sensor more sensitive to the light. Make sense? Clear as mud?

Some other fundamental concepts to consider:

  • A lot of people want to know how to get that blurred background they see in pictures (for example, where the person in a picture is in sharp focus, but the background is completely blurred out). I won’t get into this too much now, since it’s a whole other topic that could be the basis of its own post. But suffice to say, the wider the aperture (i.e. the lower the f-number), the easier it will be to get that blurred background effect.
  • When photographing a moving subject, the subject can appear to lack sharpness in the resulting picture, and even to streak across the frame in more severe cases. The way to avoid this is to use a faster shutter speed to essentially “freeze” the subject. The faster the subject is moving, the higher the shutter speed needed. For example, to get a really sharp picture of a flying bird, you’d need a faster shutter speed than you would for a stationary bird.
  • When taking pictures without a tripod, shaking of the camera due to hand movement can result in blurred pictures. To counteract this, you need to use a relatively fast shutter speed. For situations where you need slow shutter speeds to get enough light onto the image sensor, you may have to use either a tripod or a lens with image stabilization.
  • The “longer” the lens (i.e. the higher the focal length/number of mm), the higher the shutter speed needed to avoid the effects of camera shake or subject movement. There’s a rule of thumb that says the minimum shutter speed needed to avoid motion blur is the inverse of the lens focal length (this applies to unmoving subjects). So, for example, shooting handheld (without a tripod) with a 55mm lens, you would need a shutter speed of 1/55s or faster to get sharp images, while with an 18mm lens, you could get away with 1/18s. This rule changes from person to person, but the main thing to take away from it is that telephoto lenses require faster shutter speeds than wider angle lenses to get sharp images. With a tripod, this rule goes out the window with respect to camera shake. But note, however, that with respect to subject motion, higher shutter speeds are still needed for telephoto lenses, regardless of whether a tripod is being used.
  • The higher the ISO, the more sensitive to light the senor is – but there’s a downside to this: The higher the ISO, the more digital noise and loss of detail you get in the image (not to mention other nasty things like loss of colour accuracy).
  • When assessing the exposure of a picture you’ve taken on the camera LCD screen, don’t rely on the picture that’s displayed on the screen, as the brightness the screen is set at can cause you to be misled. Instead, rely on the image histogram. You can also use the “blinkies” to help guide your decision on a proper exposure. Blinkies are a feature of many modern cameras, whereby overexposed parts of the image will blink on the screen (assuming you have the correct setting turned on in the camera).

I know this is a lot of information for people just starting out in the world of photography, but I promise it becomes second nature with enough practice. Also, when starting out, I highly recommend you take advantage of the auto modes on the camera, until you’ve gotten a little more comfortable with things. A good approach might be to start in full auto mode, then as you get more comfortable, progress to one of the “semi-auto” modes (such as Tv or Av). The semi-auto modes allow you to control one particular setting (e.g. aperture) while the camera automatically sets the other settings accordingly.

How social media and smartphones can help save the world

Within a few years of Facebook’s entree into the online scene back in 2004, its popularity had exploded. By mid-2008, Facebook had reportedly attracted an astonishing 100 million users, placing it as the number one social networking site in the world.

Initially, it seemed, Facebook’s appeal to the masses lay in the fact that it provided the perfect platform for allowing people to reconnect with others from their past, be it old friends from high school, or family members that had lost touch over the years.

Certainly, my own personal excitement over the whole Facebook phenomenon began when I realized I could catch up with friends from my high school days that I hadn’t heard from in over a decade. It was great to touch base with these people and learn how they’d gotten on in life since our “less mature” days.

However, after this initial wave of nostalgic experience, it became apparent that Facebook was becoming a fun and effective means for keeping in constant touch with the people in our lives, including those who we saw on a regular basis. As the media sharing capabilities of Facebook became more and more sophisticated, people were able to easily showcase pictures of their last vacation to all their friends, and have a blast sharing goofy (and sometimes incriminating) pictures from a recent night out on the town. Essentially, Facebook, as it firmly carved out a strong position for itself in – and to a large extent, influenced the evolution of – the world of social media, was becoming the way for people to share their experiences within the various interpersonal ecosystems in which they were involved.

As Facebook became more and more feature rich, it even began to gain traction in the business world, providing a powerful tool for businesses – ranging from sole-proprietorships to small-medium enterprises, to full-on big business – to market their products, services, and brands to the mass public. While small-scale photographers could use Facebook fan pages to generate hype surrounding their latest work, large businesses could incorporate Facebook business pages and advertisements into their broad spectrum of marketing strategies. Instead of simply throwing out a passive advertisement that uses one-way communication to connect with prospective customers, businesses can now use Facebook (and certainly other social media platforms, such as Twitter; I have conspicuously left these other social media services out of the article, for no other reason than to avoid boring people to tears with an excessively lengthy piece of writing) to create an interactive venue for soliciting the active participation of customers in online discussions surrounding particular products and services.

Brilliant. So, obviously, it’s not for no reason that Facebook has recently been valued at $50 billion dollars by people who claim to be able to accurately assess the valuation of such things. But, you might ask, aside from offering a way for people to kill time at work quietly giggling over ridiculous pictures of their friends from a party the previous weekend, or for businesses to subtly work their way into the psyches of millions of unsuspecting “customers”, how does Facebook – and social media in general – help make the world a better place?

Well, as modern hardware technology has enabled us to hold small versions of what not along ago would have been considered super computers in the palms of our hands, the convergent evolution of smartphones and social media has empowered a very significant portion of the worldwide population to communicate across the globe near-instantaneously. The repercussions of this are profound.

Events occurring within the last several months, most notably in the Middle East, have given the world a taste of the potential power of social media for globally broadcasting critical events that occur in localized settings, within a very short period of time. Now, when a woman is being raped in the middle of a crowd in a destabilized country where sanity has fallen to the wayside, the rest of the world will quickly be made aware of what’s going on – sometimes even before what’s occurring has come to an end. The potential for inspiring positive reactions in both local and worldwide communities is therefore enormous, and could effect changes that, at the very least, could help prevent similar situations from occurring in the future. In some situations, this could even cut short certain damaging events, or prevent them from occurring in the first place.

Enter Vancouver, Canada in the middle of last week. After a long, drawn out, and very high-tension hockey playoffs, the Vancouver Canucks lost the Stanley Cup to the Boston Bruins. A small part of Vancouver, a city that is very passionate about its hockey, went crazy. Almost immediately after the final nail had been put in the Canucks’ coffin, a riot broke out in downtown Vancouver. So as not to digress too much, I won’t get into the details of how I feel about the unfathomably pathetic nature of this riot (especially compared to recent riots in other countries, which were sparked by far more important issues than a hockey game). But I would like to use this event as a gleaming example of how social media, coupled with smartphone technology, helped mitigate the damage, and hold many of the lowlifes involved responsible for their actions.

It’s hard to give reliable numbers of an exact nature, but I’ve heard that in as little as 20 seconds of the rioting breaking out, Facebook was lighting up with status updates and pictures from the riots, and that within a few minutes, Vancouver police had caught wind of what was going on. Incredible. Social media was allowing first hand coverage of this event to be spread across the city, and indeed across the world, within seconds of it starting!

Aside from simply reporting the events very quickly to the rest of the community, by raising immediate awareness of what was happening, the police were able to respond to the incident and contain it within a relatively short period of time (not to say it didn’t drag on for some time, but it could’ve been even worse had social media not been a factor).

The kicker though, and perhaps the most impressive aspect of how technology contributed to this event, was how social media was used after the riots had ended. Amazingly, pictures and videos that had been taken with smartphones during the riots were uploaded to Facebook, and the next day, used to identify and arrest some of the people who had reeked havoc (for example, set police cars on fire, looted Future Shop, and committed other acts of inconceivable genius) on downtown Vancouver the night before. The entire Facebook community was banding together online to identify people they knew from pictures, and bring to the attention of police incriminating Facebook conversations relating to the riot. For example, see http://www.facebook.com/pages/Vancouver-Riot-Tag-The-Hooligans/117540624999727?sk=wall.

On another front, and in a way that very showed that not all of Vancouver is a bunch of crazed, rioting morons, Facebook was used to organize a massive cleanup of downtown Vancouver a mere hours after the rioting had come to an end. A Facebook group, called “Post-riot clean-up – Let’s help Vancouver” (http://www.facebook.com/event.php?eid=219286898091948), was able to attract thousands of extremely generous volunteers to the areas affected by the riot, to help city crews clean up the mess. The publicity of this clean up effort on Facebook, aside from actually getting it going of course, was able to show the rest of the world the true spirit of Vancouver, and hopefully minimize the impact on the international perception of Vancouver as a city.

So, although Facebook and other social media is single-handedly responsible for wasting what is probably millions of dollars in employee time, with the help of powerful handheld devices, it has evolved to the point where it can have a positive influence on an entire community. Who knows what other world-changing applications of these technologies will rear their heads in the coming years.

The Story of an Osprey and its Meal

Welcome, everyone, to my blog! This is my first ever attempt at writing a blog post, so I hope you all can bear with me while I give it a shot.

For my first ever blog post, I’ve decided to write about one of the coolest wildlife experiences I’ve ever personally witnessed in nature – an osprey catching it’s dinner!

I was hanging out at Iona Beach (a nice little bird hangout near the airport in Vancouver) last weekend, with a buddy of mine, my camera, and my new Canon 400mm f5.6 lens. After basking in the beautiful (and scarce, in Vancouver) sun for a little while, we saw a big, beautiful osprey soar into the scene. Of course, the sighting of such a majestic creature is always a very exciting occurrence for someone with a camera with a big lens hanging off of it. So, my buddy and I quickly fiddled with our camera settings to get everything in order, and trained our “sights” on the osprey, and started firing away (in camera lingo, of course – no animals were harmed in the making of this blog post).

It turns out the osprey was actually trying to gather some fish for dinner. Below are some pictures of the osprey going through the amazing process of catching its prey. I’ll give you a play-by-play as I take you through the pictures. Please click on each picture to see the full-quality image.

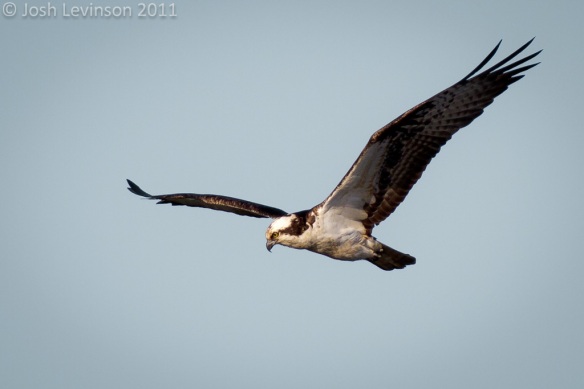
This whole thing was just incredible to watch. It started with the osprey soaring a couple hundred feet above the water. You could tell from the intense look in its eyes that it was scoping things out down below.

The process started with the osprey soaring a couple hundred feet above the water, scoping things out.

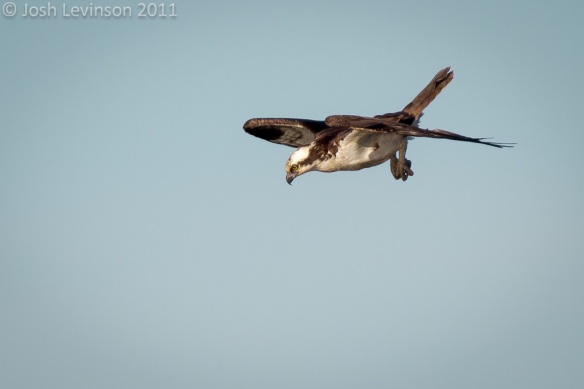
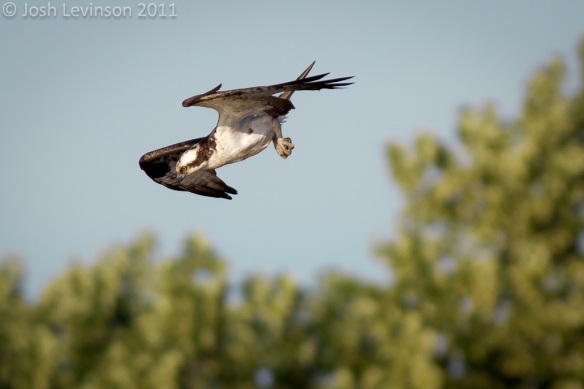
After floating around in the air for a while, all of a sudden, the osprey folded its wings in a way that apparently caused it to lose lift, and, at the same time, started aiming itself downward, going into a diving position.

Once the osprey spotted a fish, it basically started aiming itself downward...

... and made like a dive bomber.

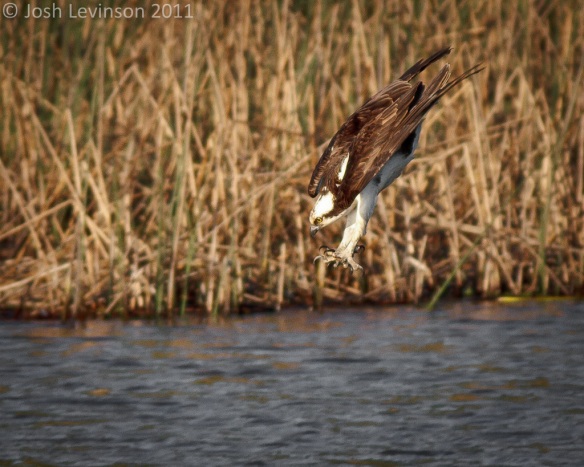
By the time the osprey had gotten closer to the water, it was in full-out dive bomber mode, with its talons stuck right out in front of it, ready to essentially spear the fish it had apparently spotted on impact.

Osprey with legs stretched out in front of it, and talons poised to grasp its target.

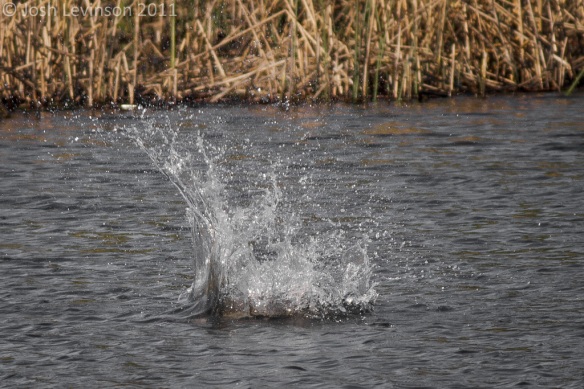
Then… SPLASH! The osprey crashed into the water, making like a submarine, and totally submerging itself.

Splash! The osprey totally submerged itself.

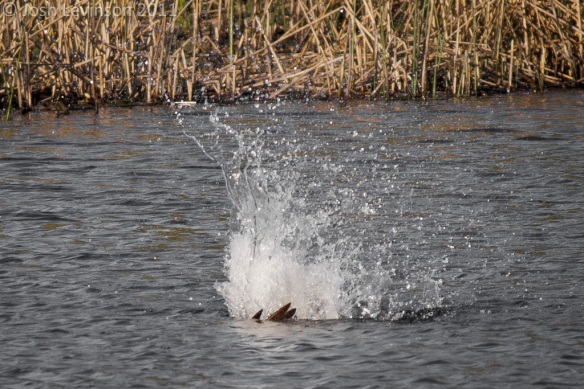
A second later, the tips of the osprey’s wings started showing again, and it began to emerge from the frenzy of splashing water.

A part of the osprey's wings started showing again.

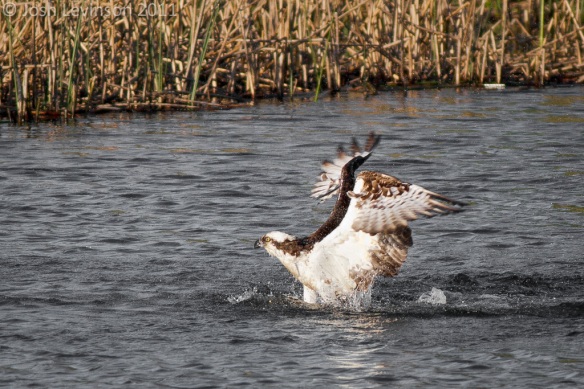
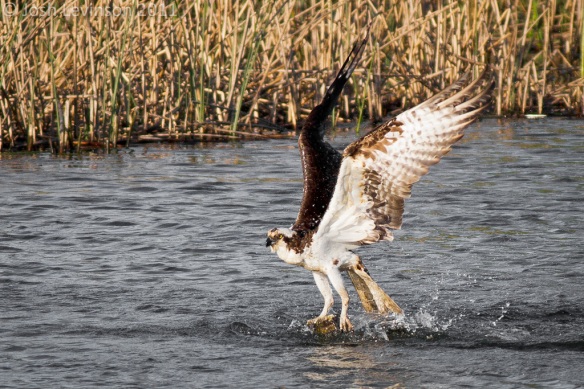
The next thing we saw was the rest of that amazing bird start to climb up out of the water, frantically flapping its giant wings to gain traction.

The osprey started climbing up out of the water.

Up and up… at this point, it looked like the osprey was walking on water!

The osprey seemed to be walking on water at this point!

The osprey seemed to be struggling a little bit to completely pull itself out of the water…

Here it looked like the osprey was having a bit of trouble pulling itself out of the water...

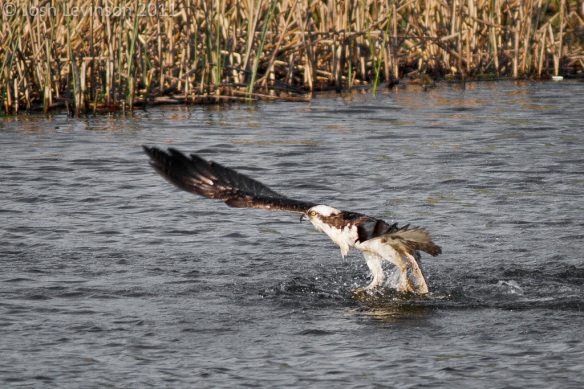
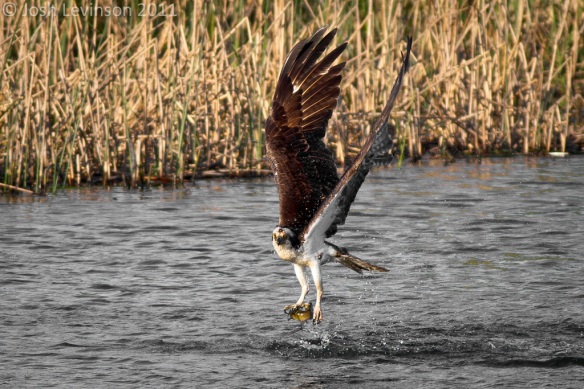
… but then we saw it had actually managed to catch a fish! Yay! (Well, great for the bird, anyway. Maybe the fish wasn’t so happy.)

... because it had the fish!

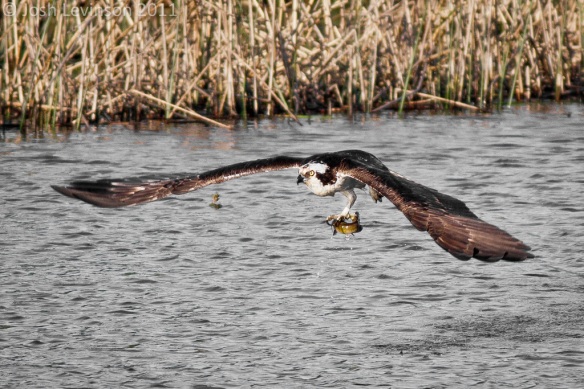
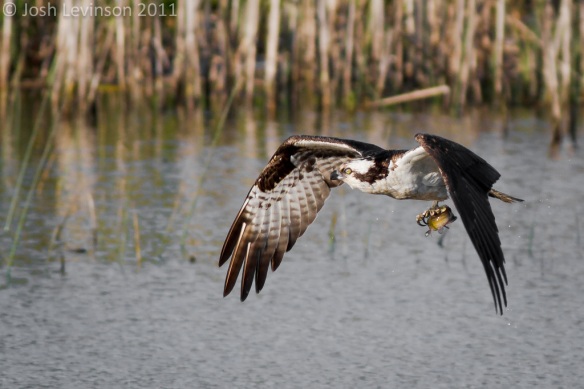
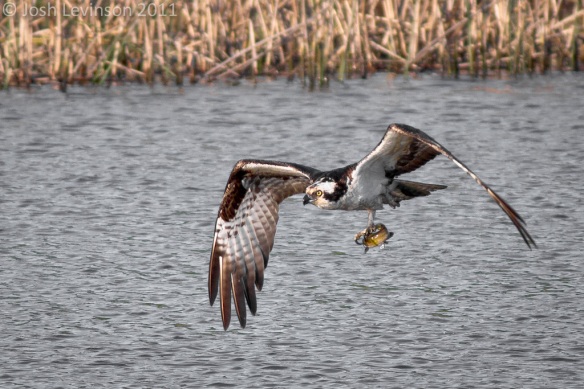
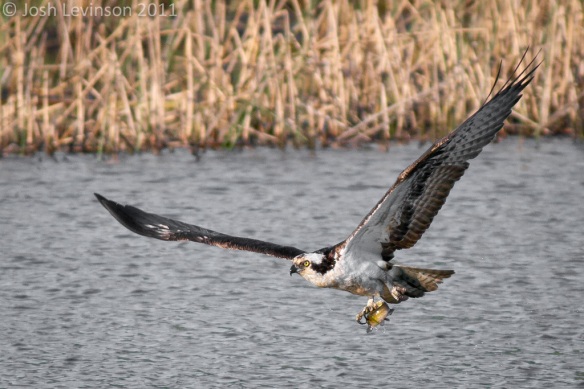
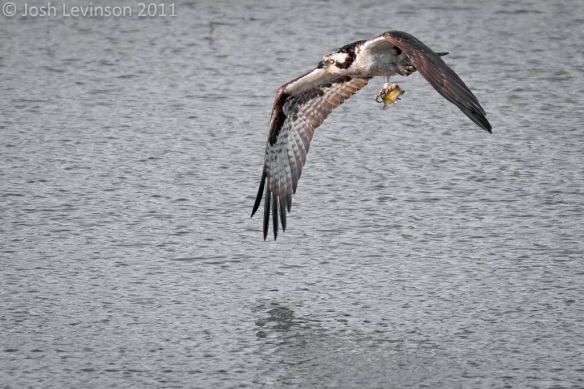
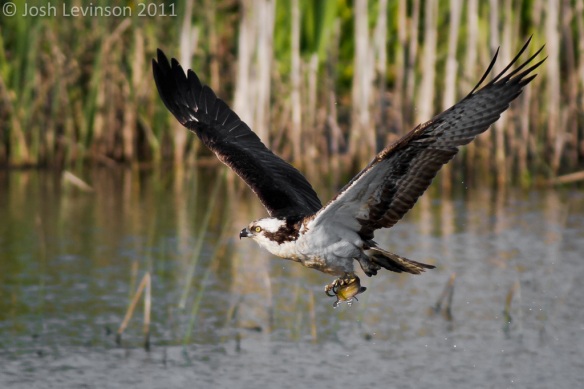
And off went the osprey, with its newly caught seafood. It was even showing off by grasping the fish with just one “hand”. From some other pictures I took a little later that evening (these pictures can be seen on my Flickr photostream: http://www.flickr.com/photos/joshlevinson), it was clear that the fish the osprey had caught was a catfish of some sort. Not the most pleasant looking fish in the world, but apparently good eating!

Off went the osprey, fish in "hand".

In this picture, if you look closely at the osprey's eye, you can see that his eyelid is partially closed.

What an incredible animal, the osprey is. Not only did it manage to spot that (relatively small) fish from a couple hundred feet above, but it was able to act as a sharpshooter’s harpoon, and spear the fish with unbelievable precision. This, ladies and gentlemen, is millions of years of evolution at work… what a perfect predator!

Either the osprey was very hungry, or perhaps it was bringing the delicious catfish sushi back to its nest to feed some youngsters, because the osprey came back four or five times that evening, repeating the process each time (amazingly, every time, the osprey went through the exact same steps – nature is so cool – sorry… this is my dorky scientist side poking through). What a sight that would be… mamma or pappa (I’m not a good enough birder to know if this was a male or female) osprey feeding some fish to a bunch of little osprey chicks! Hopefully such a sight will be in my not-too-distant photographic future (and may be fodder for a future blog post).

Well, that pretty much wraps it up for my first attempt at blogging. I hope I was able to convey even a tiny fraction of what an exciting event this was for me to witness to everyone reading this post. Thanks for reading!